Are you still capturing JPEG images to share your vZome creations on social media? Or worse, doing screen capture? There’s a better way, for most cases: vector graphics.
Formats like PDF, SVG, and Postscript are vector graphics formats. This means they record drawing commands like “move here”, “draw a line here”, and so on. Such drawings are inherently scalable — you can zoom in as much as you like, and you will never see pixellation as you would with an image format like JPEG or PNG. The files also tend to be more compact than images.
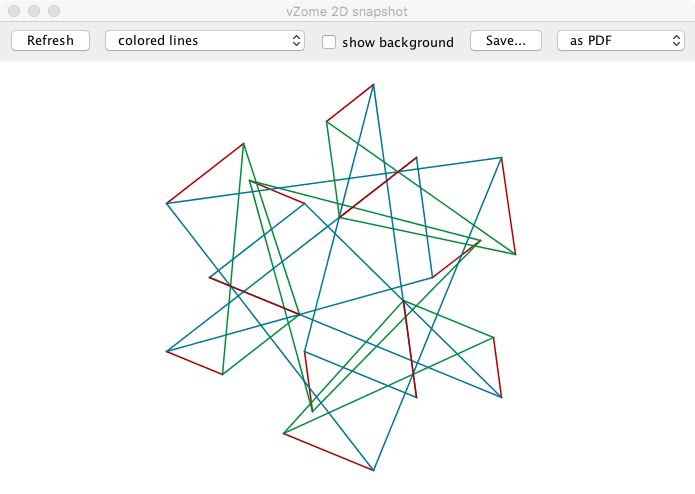
The drawing above is not an image, but a rendered SVG file. If you shrink the size of this browser window, you’ll see that the drawing shrinks also (as do the images below). More importantly, if you click on the drawing to view it in the WordPress asset viewer, then click again on that, you will see it displays as large as your browser window, unlike the image assets. You could print the drawing as a billboard and it would still look great.
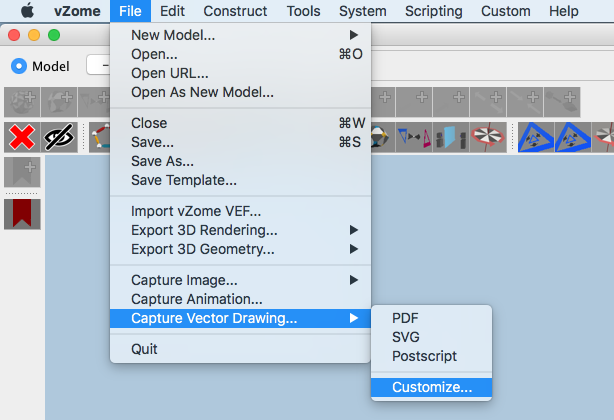
vZome has long had the ability to capture PDF, Postscript, and SVG files. With vZome 6.0 build 41, we have enhanced the capability so you have three quick commands, which do their best to capture the view in the main window, and one customizable view that gives you more interactive control.
The first three menu commands shown above will do an immediate export of the indicated file type, rendering the exact same scene you have in your main vZome window. The saved drawing will include the background, will use shaded panels, and will outline the panels or not depending on your current setting in the “System” menu.
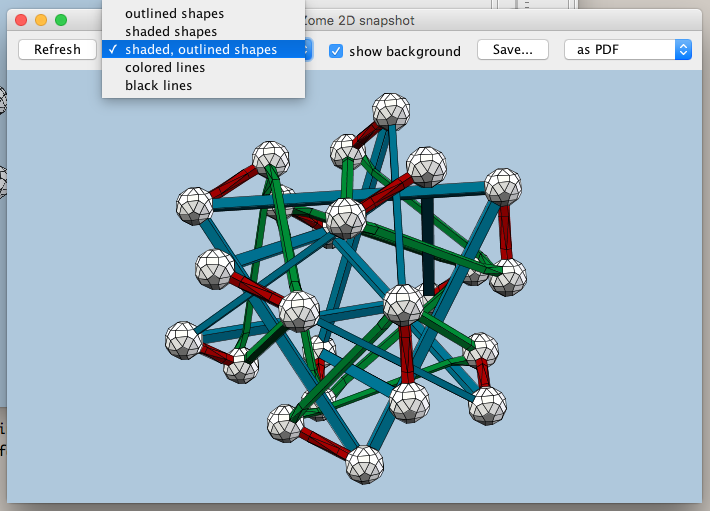
If you want more control, select the “Customize…” menu command. This will open a window giving you some options to control the drawing settings.
The menu selected in the screenshot above offers five different rendering modes. They are generally self-explanatory, with the exception of “colored lines” and “black lines”. These two options draw Zome struts as simple line segments, and Zome balls are not drawn at all. A popular option is to draw colored lines with the background disabled, as shown below.
For the best results in your 2D drawings, you may want to use the camera “snap” checkbox in the main window, or disable the perspective camera to get a parallel (orthographic) projection. If you keep the 2D snapshot window open, you can click the “refresh” button if you have changed the main view or the model it shows, and the 2D snapshot will be updated.
Automatic Capture on Save
Now you can automatically save a PDF, Postscript, or SVG drawing whenever you save your vZome models. See this updated post for details.
Issues
If your vZome model mixes panels with balls and struts, you’ll get a disappointing result in any 2D snapshot. This is because each polygon or line segment in the snapshot is drawn in its entirety, without computing any intersections with other polygons or segments. The elements are drawn using the painter’s algorithm, so everything looks fine as long as there are no intersecting parts, and panels always intersect with any adjacent balls or struts. You’ll get the best results by using only panels, or by using balls and struts with no “impossible” intersections.
If you disable perspective for your 2D snapshot capture, you’ll see that the 2D snapshot is zoomed in relative to the main view. You can work around this by zooming out in the main view and refreshing the snapshot.


Leave a Reply
You must be logged in to post a comment.